Stipple Plugins
Stipple plugins are Julia packages that add new features to a Stipple app like file downloads, markdown rendering, LaTeX formatting, and more. This page lists the available plugins with example apps to use them.
StippleDownloads
StippleDownloads is a plugin for Stipple to enable download of dynamically generated files. The event-based handlers guarantee that only the requesting client receives a copy of the file.
There is support for text and binary files, filenames can be freely chosen.
Examples
Downloading a variable's content as raw data or as BSON
using Stipple, Stipple.ReactiveTools
using StippleUI, StippleDownloads
using BSON

@app begin
    @in data = randn(1000)

    @event download_raw begin
        download_binary(__model__, data, "raw")
    end
    @event download_bson begin
        # calling @save on `data` throws an error because it is a reactive variable. Need to make a copy
        data_var = data
        io = IOBuffer()
        BSON.@save io data_var
        seekstart(io)
        download_binary(__model__, take!(io), "data.bson")
    end

end

function ui()
    row([
            cell(btn(class="q-ml-lg", "Raw", icon="download", @on(:click, :download_raw, :addclient), color="primary", nocaps=true))
            cell(btn(class="q-ml-lg", "BSON", icon="download", @on(:click, :download_bson, :addclient), color="secondary", nocaps=true))
        ])

end

@page("/", ui)
Downloading a DataFrame as an Excel sheet
using Stipple, Stipple.ReactiveTools
using StippleUI
using StippleDownloads

using DataFrames
using XLSX

import Stipple.opts
import StippleUI.Tables.table

function df_to_xlsx(df)
    io = IOBuffer()
    XLSX.writetable(io, df)
    take!(io)
end

@app begin
    @out table = DataTable(DataFrame(:a => rand(1:10, 5), :b => rand(1:10, 5)))
    @in text = "The quick brown fox jumped over the ..."

    @event download_text begin
        download_text(__model__, :text)
    end

    @event download_df begin
        try
            download_binary(__model__, df_to_xlsx(table.data), "file.xlsx"; client = event["_client"])
        catch ex
            println(ex)
        end
    end
end

function ui()
    row(cell(class = "st-module", [

        row([
            cell(textfield(class = "q-pr-md", "Download text", :text, placeholder = "no output yet ...", :outlined, :filled, type = "textarea"))
            cell(table(class = "q-pl-md", :table))
        ])

        row([
            cell(col = 1, "Without client info")
            cell(btn("Text File", icon = "download", @on(:click, :download_text), color = "primary", nocaps = true))
            cell(col = 1, "With client info")
            cell(btn(class = "q-ml-lg", "Excel File", icon = "download", @on(:click, :download_df, :addclient), color = "primary", nocaps = true))
        ])
    ]))
end

@page("/", ui)

up(open_browser = true)
To see the difference between calling with or without client info, duplicate the applications's tab and click the 'Download Text' button.
Two identical files will be downloaded, because duplicating the tab establishes a synchronised copy of your app. To ensure that only the requesting client receives a file, you should restrict the download to the client via event["_client"]
and make sure that the triggering button has an additional :addclient to include this information.

StippleMarkdown
Render Markdown text in your Genie apps
This package provides two new Stipple components: markdowntext and markdowncard. As arguments, You can either pass a string of Markdown text or a symbol that refers to a variable containing Markdown text.
using GenieFramework
@genietools
using StippleMarkdown

@app begin
    @out txt = "**hello** world"
end
@deps StippleMarkdown

ui() = [ markdowntext(:txt), markdowntext("## Hello World!"), markdowncard(:txt), markdowncard("## Hello World!\n This is a Markdown card")]

@page("/", ui)
StippleLatex
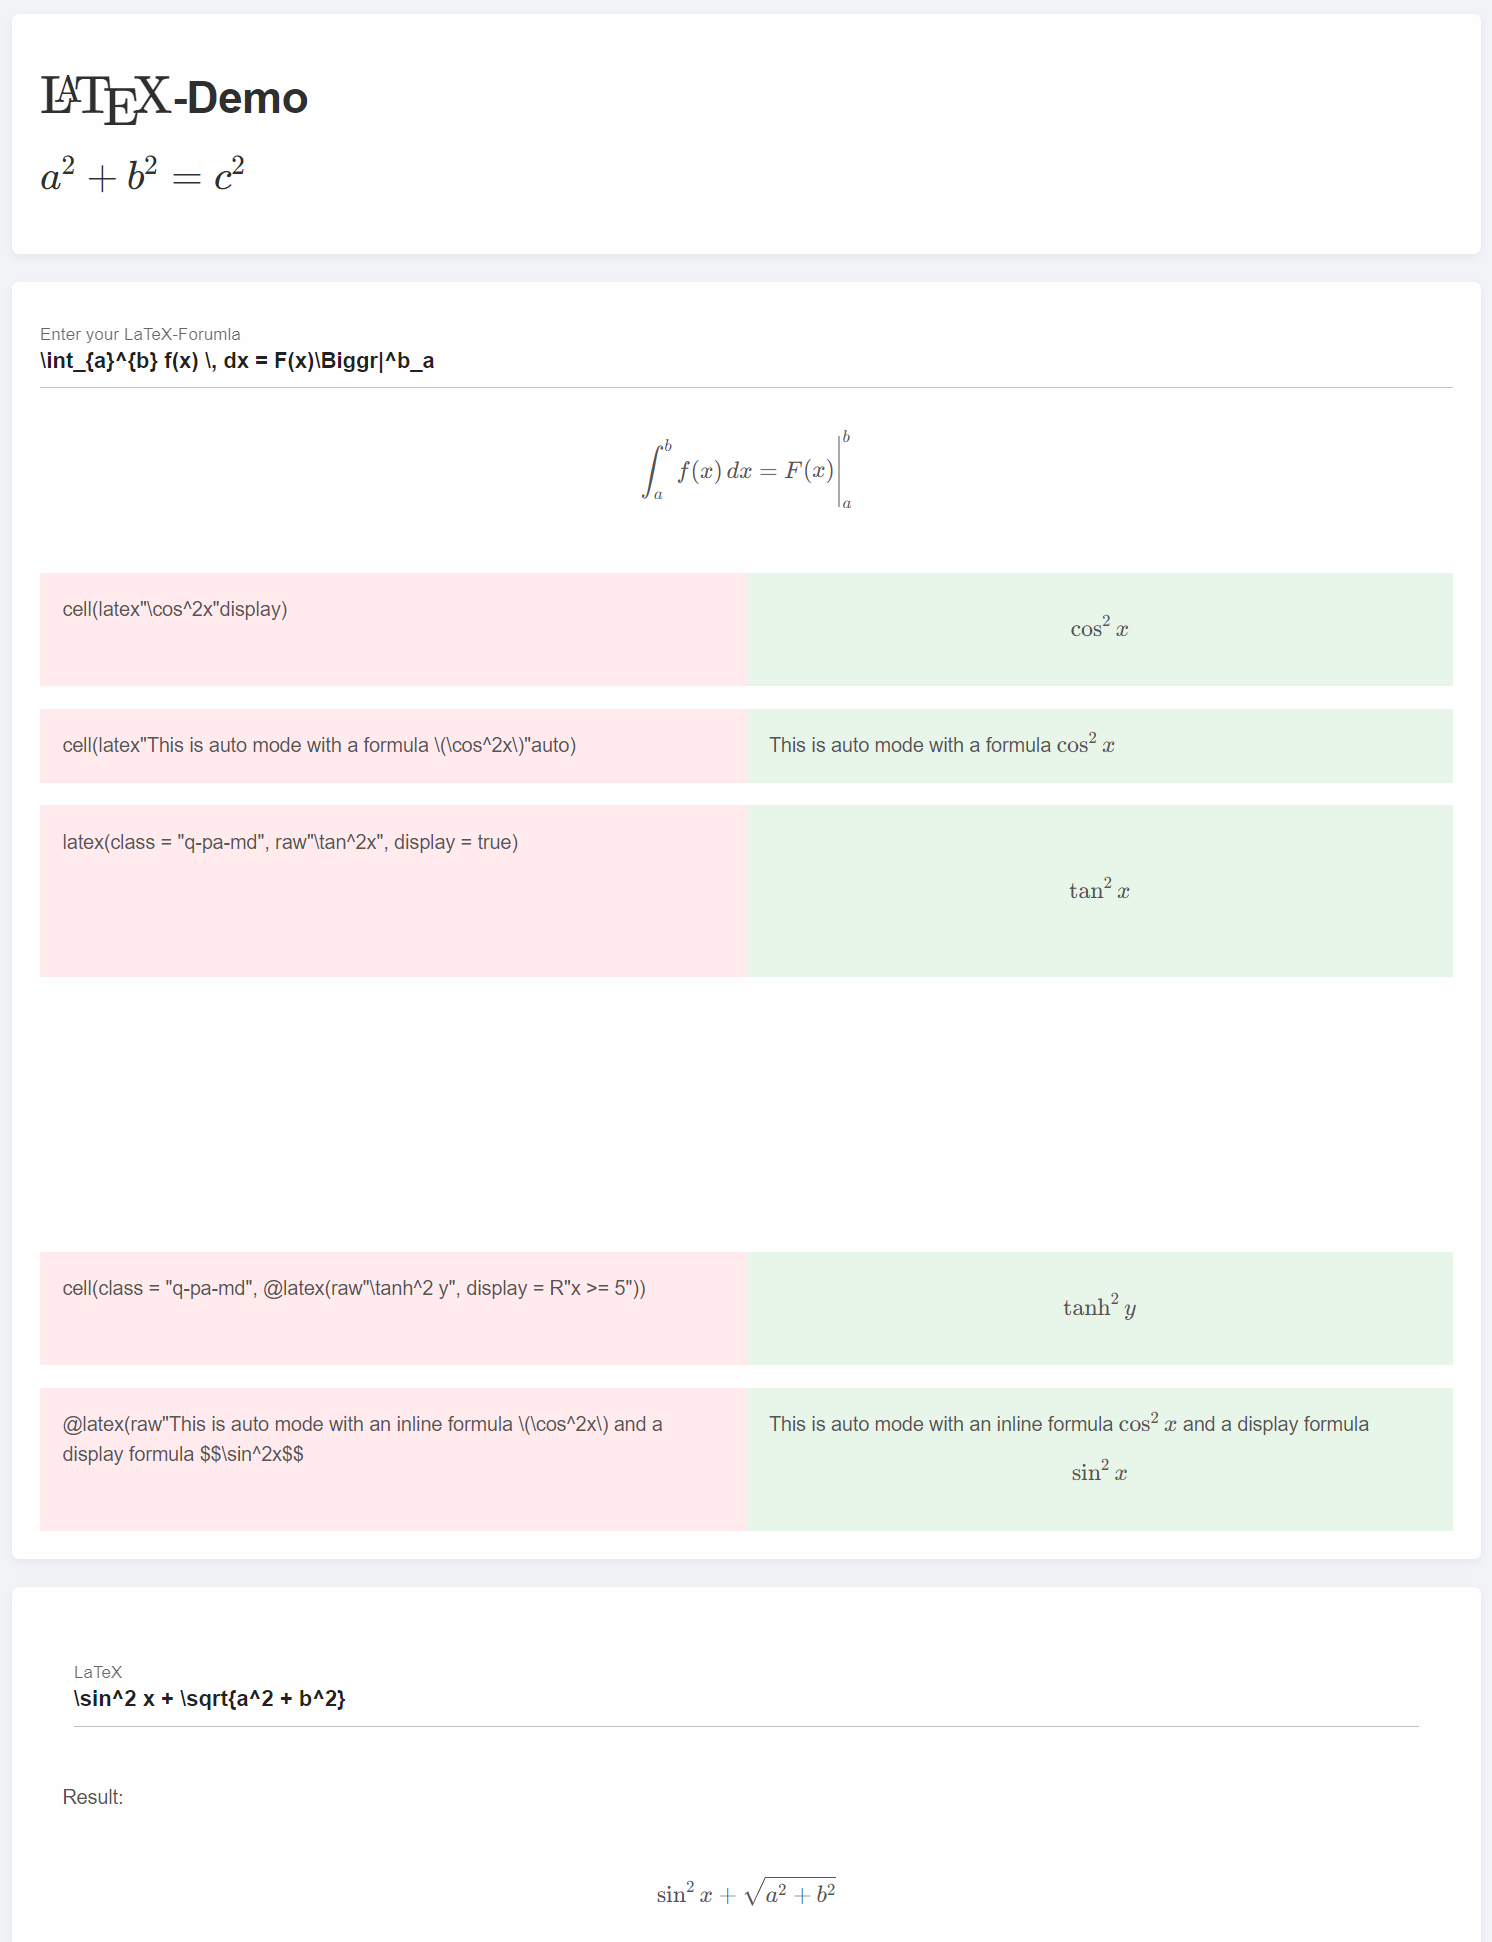
StippleLatex uses Vue-Katex to imlement LaTeX-Formatting in Stipple. There are three possibilities of entering LaTeX content in your web page
- Latex-span element.
latex(<LaTeX formula>, <formatting options>) - HTML element with latex content via string macro with an optional modifier which can take the values
autoordisplayspan(latex"<LaTeX formula>")span(latex"<LaTeX formula>"display) - HTML element with latex content via
@latexmacro with additional optionsspan(@latex(raw"<LaTeX formula>")span(@latex(raw"<LaTeX formula>", display = true)
All arguments also support Symbols to bind to model fields. Here's a demo app that shows possible use cases.
using Stipple, Stipple.ReactiveTools
using StippleUI
using StippleLatex

## define a small formula generator
function nestlist(f, a; init = nothing)
    T = eltype(a)
    list = T[]
    el = init
    for (i, x) in enumerate(a)
        el = i == 1 && init === nothing ? x : f(el, x)
        push!(list, el)
    end
    list
end

formula = nestlist(*, ["", raw"\sin", "^2", " x", " +", raw" \sqrt{", "a", "^2", " +", " b", "^2"])
formula[contains.(formula, "sqrt")] .*= "}"

## setting up the app
@app begin
    @in x = 0
    @in formula_1 = raw"\int_{a}^{b} f(x) \, dx = F(x)\Biggr|^b_a"
    @in formula_2 = raw""
    @private p = @task 1 + 1

    @onchange isready begin
        if !istaskstarted(p) || istaskdone(p)
            p = @task begin
                println("Task started")
                while x <= 100
                    sleep(1)
                    x += 1
                    pos = x < 6 ? 1 : (x - 5) % (length(formula) + 5) + 1
                    formula_2 = formula[min(pos, length(formula))]
                end
            end
            schedule(p)
        end
    end
end

function ui()
    [
        row(cell(class = "st-module", [
            cell(h1(latex("\\LaTeX") * "-Demo"))
            cell(h2(latex"a^2 + b^2 = c^2"))
        ]))

        row(cell(class = "st-module", [
            textfield("Enter your LaTeX-Forumla", :formula_1,)
            cell(class = "q-pa-md", latex":formula_1"display)
            row([
                cell(class = "q-pa-md bg-red-1", raw"""cell(latex"\cos^2x"display)""")
                cell(class = "q-pa-md bg-green-1", latex"\cos^2x"display)
            ])
            row([
                cell(class = "q-pa-md bg-red-1", raw"""cell(latex"This is auto mode with a formula \(\cos^2x\)"auto)""")
                cell(class = "q-pa-md bg-green-1", latex"This is auto mode with a formula \(\cos^2x\)"auto)
            ])
            row([
                cell(class = "q-pa-md bg-red-1", raw"""latex(class = "q-pa-md", raw"\tan^2x", display = true)""")
                cell(class = "bg-green-1 q-pa-md", latex(class = "q-pa-md", raw"\tan^2x", display = true))
            ])
            bignumber("Wait for 5", :x, color = R"x >= 5 ? 'negative' : 'positive'", icon = "calculate")

            row([
                cell(class = "q-pa-md bg-red-1", raw"""cell(class = "q-pa-md", @latex(raw"\tanh^2 y", display = R"x >= 5"))""")
                cell(class = "q-pa-md bg-green-1", @latex(raw"\tanh^2 y", display = R"x >= 5"))
            ])


            row([
                cell(class = "q-pa-md bg-red-1", raw"""@latex(raw"This is auto mode with an inline formula \(\cos^2x\) and a display formula $$\sin^2x$$""")
                cell(class = "q-pa-md bg-green-1", @latex(raw"This is auto mode with an inline formula \(\cos^2x\) and a display formula $$\sin^2x$$", auto = true))
            ])
        ]))

        row(cell(class = "st-module", [
            textfield(class = "q-pa-lg", "LaTeX", :formula_2)
            cell(class = "q-pa-md", "Result:")
            cell(class = "q-pa-md", latex":formula_2"display)
        ]))
    ]
end

route("/") do
    page(@init(), ui()) |> html
end

up()

StippleMathjs
StippleMathjs adds mathjs to your Stipple or GenieFramwork project.
Furthermore, it adds automatic conversion of all types of Complex numbers between server and client.
Example App
using Stipple, Stipple.ReactiveTools
using StippleUI
using StippleMathjs


x0 = 1.0
y0 = 2.0

@app begin
    @in x = x0
    @in y = y0
    @in z = x0 + y0 * im
    @in z2::ComplexF64 = x0 + y0 * im

    @onchange x, y begin
        # update z without triggering `@onchange z`
        z[!] = x + y * im

        # update x and y of the client(s)
        @push z
    end

    @onchange z begin
        # update x and y without triggering `@onchange x, y`
        x[!] = z.re
        y[!] = z.im

        # update x and y of the client(s)
        @push x
        @push y
    end
end

@deps StippleMathjs

function ui()
    [
        card(class = "q-pa-md", [
            numberfield(class = "q-ma-md", "x", :x)
            numberfield(class = "q-ma-md", "y", :y)
        ])

        card(class = "q-pa-md q-my-md", [
            row([cell(col = 2, "z"),        cell("{{ z }}")])
            row([cell(col = 2, "z.mul(z)"), cell("{{ z.mul(z) }}")])
            row([cell(col = 2, "z.abs()"),  cell("{{ z.abs() }}")])

            btn(class = "q-my-md", "square(z)", color = "primary", @click("z = z.mul(z)"))
        ])
    ]
end

@page("/", ui, debounce = 10)
up()

The example app with a correct Manifest.toml is available on StippleDemos.jl
Note
- Due to a current bug in Stipple you need to define
x0andy0outside the loop in order to guarantee that z is of the correct type. Alternatively, you could declarezexplicitly, e.g. asz::ComplexF64 - This package can serve as a good example how to embed other javascript sources into your own project.
StippleKeplerGL.jl

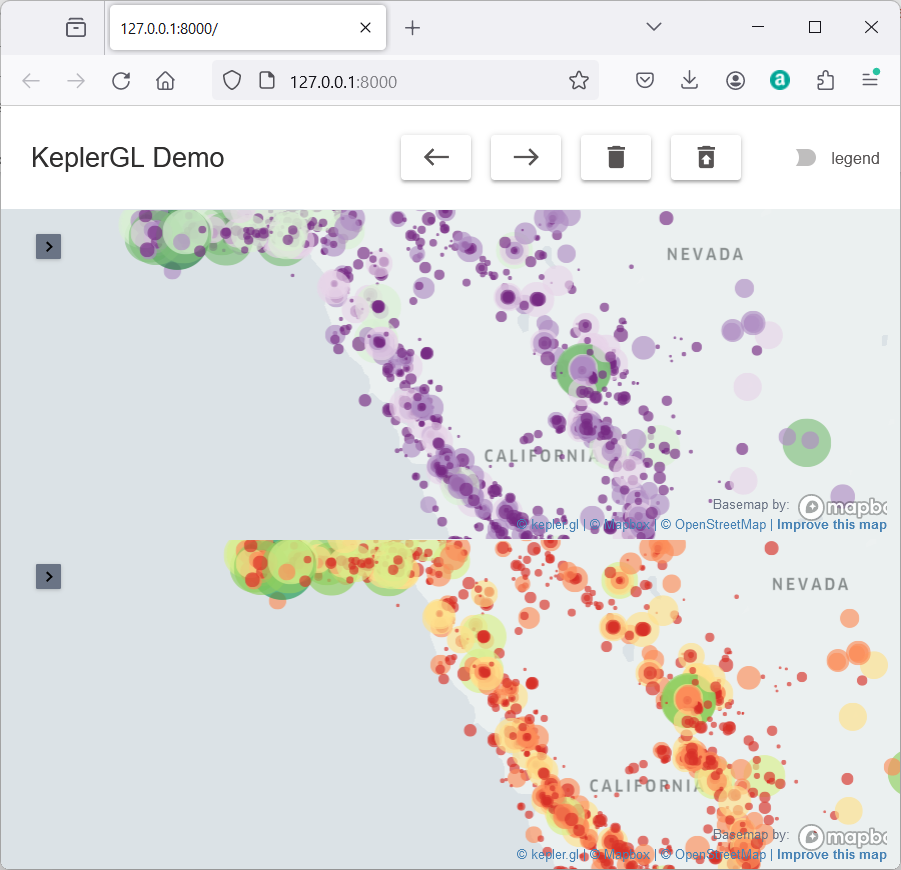
Julia package to integrate KeplerGL maps into Genie/Stipple applications.
Acknowledgement
This package uses the great package KeplerGL.jl under the hood.
Installation
To install the package, type in the Julia command prompt
] add StippleKeplerGL
Example
using Stipple, Stipple.ReactiveTools
using StippleUI
using StippleKeplerGL
using DataFrames
using CSV
using Colors
using ColorBrewer

keplergl_path = Base.pkgdir(isdefined(@__MODULE__, :KeplerGLBase) ? KeplerGLBase : KeplerGL)
df = CSV.read(joinpath(keplergl_path, "assets", "example_data", "data.csv"), DataFrame)

## token = "token please"

m1 = KeplerGL.KeplerGLMap(token, center_map=false)

KeplerGL.add_point_layer!(m1, df, :Latitude, :Longitude,
    color = colorant"rgb(23,184,190)", color_field = :Magnitude, color_scale = "quantize",
    color_range = ColorBrewer.palette("PRGn", 6),
    radius_field = :Magnitude, radius_scale = "sqrt", radius_range = [4.2, 96.2], radius_fixed = false,
    filled = true, opacity = 0.39, outline = false
)

m1.config[:config][:mapState][:latitude] = 38.32068477880718
m1.config[:config][:mapState][:longitude]= -120.42806781055732
m1.config[:config][:mapState][:zoom] = 4.886825331541375
m1.window[:map_legend_show] = m1.window[:map_legend_active] = m1.window[:visible_layers_show] = m1.window[:visible_layers_active] = false

m2 = KeplerGL.KeplerGLMap(token, center_map=false)

KeplerGL.add_point_layer!(m2, df, :Latitude, :Longitude,
    color = colorant"rgb(23,184,190)", color_field = :Magnitude, color_scale = "quantize",
    color_range = ColorBrewer.palette("RdYlGn", 6),
    radius_field = :Magnitude, radius_scale = "sqrt", radius_range = [4.2, 96.2], radius_fixed = false,
    filled = true, opacity = 0.39, outline = false
)

m2.config[:config][:mapState][:latitude] = 38.32068477880718
m2.config[:config][:mapState][:longitude]= -122.42806781055732
m2.config[:config][:mapState][:zoom] = 4.886825331541375
m2.window[:map_legend_show] = m2.window[:map_legend_active] = m2.window[:visible_layers_show] = m2.window[:visible_layers_active] = false

d1, d2 = m1.datasets, m2.datasets

@app begin
    @out map1 = m1
    @out map2 = m2
    @in clear_data = false
    @in restore_data = false
    @in show_legend = false
    @in go_west = false
    @in go_east = false

    @onbutton clear_data begin
        __model__["map1.datasets"] = []
        __model__["map2.datasets"] = []
    end

    @onbutton restore_data begin
        __model__["map1.datasets"] = d1
        __model__["map2.datasets"] = d2
    end

    @onbutton go_west begin
        map1.config[:config][:mapState][:longitude] -= 1
        __model__["map1.config.config.mapState.longitude"] = map1.config[:config][:mapState][:longitude]

        map2.config[:config][:mapState][:longitude] -= 1
        __model__["map2.config.config.mapState.longitude"] = map2.config[:config][:mapState][:longitude]
    end

    @onbutton go_east begin
        map1.config[:config][:mapState][:longitude] += 1
        __model__["map1.config.config.mapState.longitude"] = map1.config[:config][:mapState][:longitude]

        map2.config[:config][:mapState][:longitude] += 1
        __model__["map2.config.config.mapState.longitude"] = map2.config[:config][:mapState][:longitude]
    end

    @onchange show_legend begin
        __model__["map1.window.map_legend_show"] = show_legend
        __model__["map2.window.map_legend_show"] = show_legend

        # alternatively, one could use the following lines to show the legend via the backend
        # but this will transmit the full map data to the frontend

        # map1.window[:map_legend_show] = show_legend
        # notify(map1)
    end
end

@deps StippleKeplerGL
isdefined(Stipple, :register_global_components) && Stipple.register_global_components("VueKeplerGl", legacy = true)

ui() = [
    column(class = "full-height", [
        row(col = :auto, class = "items-center", [
            h5(class = "col-auto q-pl-lg q-py-md", "KeplerGL Demo")
            cell()
            btn(col = :auto, "", icon = "west", @click(:go_west), class = "q-mr-md", [tooltip("go west")])
            btn(col = :auto, "", icon = "east", @click(:go_east), class = "q-mr-md", [tooltip("go east")])
            btn(col = :auto, "", icon = "delete", @click(:clear_data), class = "q-mr-md", [tooltip("clear data")])
            btn(col = :auto, "", icon = "restore_from_trash", @click(:restore_data), class = "q-mr-md", [tooltip("restore data")])
            toggle(col = :auto, "legend", :show_legend, class = "q-mr-md")
        ])

        cell(keplergl(:map1, ref = "map1", id = "map1"))
        cell(keplergl(:map2, ref = "map2"))
    ])
]

route("/") do
    # uncomment next line for testing / debugging
    global model
    model = @init
    page(class = "fixed-full", model, ui) |> html
end

up(open_browser = true)
StippleTypedArrays
StippleTypedArrays is a Stipple plugin to integrate Javascript TypedArrays.
Typical use cases are buffers that are used, e.g. for downloading files or processing and sending information via binary channels.
StippleTypedArrays introduces an Vector wrapper TypedArray that can be used in type declarations for app variables.
Caveat:
On the backend side all handlers work as normal. However, on the client side javascript cannot watch typed arrays, so any change of the buffer on the client side will not be automatically synchronised.
If you want to sync your data to the server, you have to do it by callin this.push('data') after updating the value.
Demo App
using Stipple, Stipple.ReactiveTools
using StippleUI

using StippleTypedArrays
using StippleDownloads

@app begin
    @in data = TypedArray(UInt8[])a
    @in data64 = TypedArray(UInt64[])

    @in add_data = false
    @in clear_data = false

    @onbutton add_data begin
        x = rand(0:255)
        push!(data, x)
        notify(data)
        push!(data64, x + 1000)
        notify(data64)
    end

    @onbutton clear_data begin
        data = data64 = []
    end
end

@deps StippleTypedArrays

function ui()
    row(cell(class = "st-module q-ma-md", [

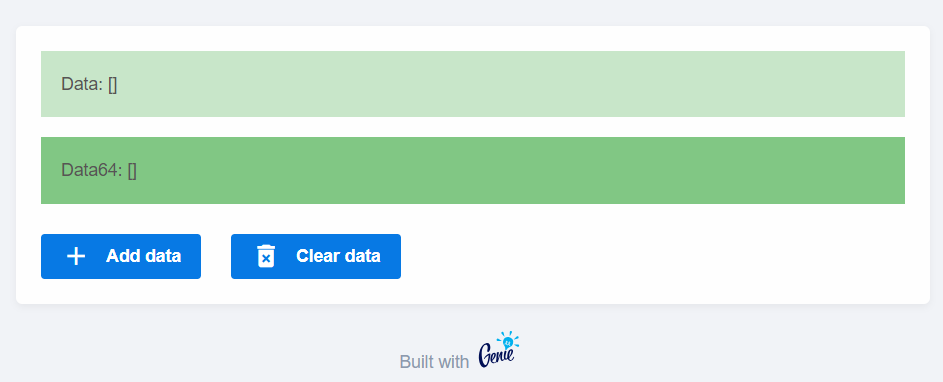
        row(class = "q-pa-md bg-green-2", "Data: [{{ data }}]")
        row(class = "q-pa-md q-my-lg bg-green-4", "Data64: [{{ data64 }}]")

        row([
            btn("Add data", icon = "add", @click(:add_data), color = "primary", nocaps = true)
            btn(class = "q-ml-lg", "Clear data", icon = "delete_forever", @click(:clear_data), color = "primary", nocaps = true)
        ])
    ]))
end

@page("/", ui)

up(open_browser = true)
