Introduction to reactive UIs
In a reactive web application, users interact with and explore data through various interface elements like text fields, buttons, and menus. With each user interaction, the application responds by executing certain code that manipulates the underlying data and promptly reflects these changes in the user interface.
In general, there are four building blocks to a reactive app:
Data analysis: code performing the computations and transformations that process and analyze the data.
Reactive variables: serving as the core of a reactive application, these variables monitor their own state for any changes. Once a change is detected, they relay this change throughout the application, ensuring all components are updated accordingly.
UI components: the elements within the browser with which users interact. Typically, each UI component is bound to one or more reactive variables. Consequently, changes in the UI (for instance, when a user types into a text box) are instantly reflected in the associated reactive variables and vice versa.
Reactive handlers: these are code snippets that respond to user actions like clicks or key presses. When triggered, reactive variables are updated, which, in turn, triggers updates in the UI or elsewhere in the app.
Genie provides all you need to implement all of the above and turn your Julia code into a web app with:
- A library of interactive UI components.
- A small but complete set of Julia constructs to implement the app's logic, which is comprised of data analysis and reactive codes.
And if you need more, with Genie Framework you can build APIs, connect to databases, and more.
A simple Genie app
Let's create an example Genie app which takes a message in a text box and displays how many vowels are in it.
To implement this, we need the following elements:
- Data analysis: a function to calculate the number of vowels in a sentence.
- UI components: a text field to get the text, and an element to display the number of vowels.
- Reactive variables: one to hold the text, and another to hold the vowel count.
- Reactive handler: code that counts the vowels whenever a character is typed in.
A Genie app is formed by two files by default: app.jl, containing the app's logic in Julia, and app.jl.html, containing the UI declared in HTML. Below is the code for the example app, which we will break down next.
module App
using GenieFramework
@genietools

function count_vowels(message)
    sum([c ∈ ['a', 'e', 'i', 'o', 'u'] for c in lowercase(message)])
end

@app begin
    @in message = ""
    @out vowels = 0
    @onchange message begin
        vowels = count_vowels(message)
    end
end

@page("/", "app.jl.html")
end
::
App logic
The app's logic is implemented in app.jl within the App module. In it, we find the following parts: imports, data analysis, reactive code within the @app block, and route definition with @page.
1. Imports
using GenieFramework
@genietools
The GenieFramework package imports all the tools necessary to build web apps, and the @genietools macro sets up the development environment.
2. Data analysis
function count_vowels(message)
    sum([c ∈ ['a', 'e', 'i', 'o', 'u'] for c in lowercase(message)])
end
Next, we've defined the count_vowels function right in app.jl between the imports and the reactive code block.
You'll usually want to add some code to perform data analysis tasks. While for simple apps it is sufficient to have all Julia code in app.jl, it is also possible to import code from other files with an include call at the top of the file.
3. Reactive code
@app begin
    @in message = ""
    @out vowels = 0
    @onchange message begin
        vowels = count_vowels(message)
    end
end
The reactive code is defined all within the @app block. Here, state variables are specified with the @in or @out macro depending on their use:
@infor variables that take their value from a UI component. For instance, a text field storing text or a slider storing the selected number.@outfor variables that output their value to a UI component. For instance, a text label or a plot.
These variables are reactive: when an input variable is modified in the browser, its value is automatically modified on the server. Similarly, modifying a variable on the server in the Julia code will update the value on the browser.
The @onchange macro implements the routines to handle user interaction. It watches one or more variables and, when their value changes, executes a code block.
Reactive variables tagged with @in or @out can only be modified within a block delimited by the @onchange macro. Any changes made outside of it will not be reflected in the UI.
4. Routes
@page("/", "app.jl.html")
Finally, the @page macro defines a route. The app.jl.html page will be loaded when the browser accesses the root path /.
App UI
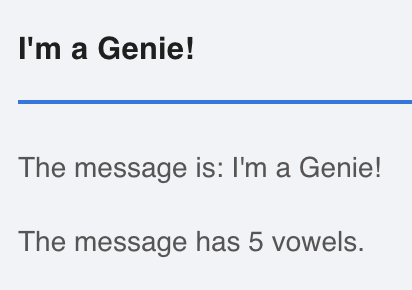
<div>
    <q-input v-model="message"/>
    <br>
    <p> The message is: {{message}}</p>
    <p> The message has {{vowels}} vowels.</p>
</div>
The UI is implemented with basic HTML components and components from the Quasar framework. This framework bundles HTML with JavaScript code to enable two-way synchronization between the UI and the backend. Quasar component names are prefaced by the q letter, such as for instance in the q-btn or q-slider components. See here for a list of available components.
To make enable synchronization of a Quasar component's state with the backend, a Julia variable must be bound to it via the v-model field.
<q-input v-model="message"/>
Another directive is v-on:click, which executes some code when the user clicks on the component. For instance, it can be used to trigger actions on a button:
<q-btn label="Reset!" v-on:click="reset = !reset"></q-btn>
To learn more about the available components and their usage, check out the Documentation and the app gallery.
Besides the UI components, it is possible to display a variable's value with the double mustache syntax {{}}. Furthermore, this syntax accepts arbitrary JavaScript expressions that will be evaluated when the page loads.
Running Genie apps
To run the app outside of Genie Builder, first navigate to the directory where the code is and execute
julia --project -i -e 'using Pkg; Pkg.add("GenieFramework")'
Then, launch Julia with julia --project and run the app:
julia> using GenieFramework
julia> Genie.loadapp() # load app
julia> up() # start server
While developing, you can make changes to a running app's code. They will be automatically loaded and the UI will refresh.